Friday, October 8, 2010

Tip #80: Known Issues

Tip: As with most new software, Blackboard 9 has a few bugs. In order to track these and help faculty be aware of potential problem areas, we have created a known issues list.

The complete known issues list can be found at http://www.twu.edu/blackboard/13251.asp

The following known issues are pervasive issues across campus which many users have experienced.

Blogs, Journals, and Wikis

Some users receive error messages and experience intermittent access when attempting to connect to blogs, journals, and wikis. Blackboard has applied a patch which has resolved the issue. If you continue to receive an error message, this issue can be resolved by clearing your browser cache.

To do so:
Close all browser instances then launch a single instance.
For IE8: Tools >> Internet Options >> Browsing History… >> Delete >> check Temporary Internet files, Cookies, and History >> uncheck Preserve Favorites website data >> Delete

For Firefox 3.5 or greater: Tools >> Clear Recent History >> set Time range to Everything >> check Cookies and Cache >> Clear Now

For IE7: Tools >> Internet Options >> Browsing History… >> Delete >> Delete files… >> Delete cookies… >> Delete history…

Safari: Tools >> Reset Safari >> check Empty the cache and Remove all cookies >> Reset
Exit and then re-launch the browser.

For other browser directions, see: http://www.bnl.gov/itd/webapps/browserCache.asp

If, after following these steps, the 404 error continues to occur, send an email to blackboard@twu.edu to let us know.

Discussion Board Attachments

Students are unable to view files that instructors have attached, and instructors are unable to view files that students have attached using the Visual Text Box Editor.
  • Instructors should use the "Attach File" icon on the Visual Text Box Editor toolbar.

  • Students should use the "Browse My Computer" button in the Attachments section below the Visual Text Box Editor.

HTML

Inserting HTML in areas of the course where HTML is not expected can cause parts of the course to be inaccessible or to not function. We suggest that HTML only be incorporated in text areas that have a related Visual Text Box Editor available.

Announcement, Assessment, Assignment, Discussion Board

If an item is setup with a start date but no end date or with an end date but no start date, the item cannot be modified.

For this reason, it is important to either set both a start date and an end date (even if the end date is dated far in the future) or set neither. Also, do not use both availability dates and adaptive release.

Know of other issues?

If you know of an issue that is not currently on the complete known issues list, please let us know at blackboard@twu.edu.

Monday, October 4, 2010

Tip of the Week: Virtual Posters

Web 2.0 Tools: Glogster & Wallwisher
Poster presentations are popular in many arenas of higher education. Faculty present research, staff present projects, and students present both research and projects. Presenting a poster virtually allows greater sharing of the information.

What tools are available?

  • Glogster is a digital poster board web 2.0 tool that allows creators to add links to websites, include pictures, choose background theme, shapes and characters from the gallery, text, and embed audio and video files. For class settings, an instructor can create an account for the class and give each student a space to create their own poster. When posters are shared with others, they can “rate” the posters. The creator has the option to make the poster public or private.

  • Wallwisher is web 2.0 tool designed to create bulletin boards with such items as images, videos, audio links, websites to be uploaded, as well as background or theme choices. When sharing the bulletin board with others, they can give feedback. During the creation of the bulletin board, choices are given about who can view, who can post sticky notes or feedback, and the URL for the site. Those giving feedback can also include web links, audio or video files, images, and text. Creators also have an option to “approve” any feedback before it is posted.
Web 2.0 tools are available to anyone with internet access. Each Web 2.0 tool website offers information about that tool including support options, if available.

Wednesday, September 29, 2010

Tip #78: Naming Files for Blackboard

Tip: You can reduce the number of error messages you and students receive when opening files by appropriately naming files uploaded to Blackboard.

How to do it:


There are several file name characters that may lead to error messages when instructors or students upload or download files. To reduce the occurrence of those errors, follow these naming conventions:
  • Use only letters, numbers, underscores, and hyphens in file names
  • Use hyphens or underscores in place of spaces in file names
  • Do not use periods in a file name, except before the file extension (e.g. “Name_test1.doc”)
  • Do not use spaces, commas, pound signs (#), question marks, equal signs, ampersands (&), asterisks (*), or any other special characters in file names
  • Keep file names under 30 characters in length
NOTE: You may recommend to students that they follow these same naming conventions. Suggest that they make their filenames as short, descriptive, and unique as possible. Having them use their last name along with the assignment name is a useful strategy. This is helpful when you are downloading multiple students’ files at once (e.g. downloading students’ completed assignments).

Monday, September 27, 2010

Online Tools for Groups

Blackboard Organizations and Web 2.0 Tools Qlubb & Wiggio
Groups can move into the online world with Blackboard and web 2.0 tools Qlubb and Wiggio. Groups can benefit with shared calendars, file storage, event invites & rsvps, photo sharing, polls, and more. Any kind of group from professional organizations, campus clubs, or hobby groups can use these tools to enhance communication and make organizing easier.

Working within the TWU Community

  • Blackboard offers organizations for group use. Department faculty & staff groups, campus organizations, or specific majors within departments can use this online resource to share announcements, forms, discussion boards and more. Some organizations use this feature to do training or offer policies and procedures, such as Risk Management. Organizations can even be structured so that users can enroll themselves, to minimize administrative functions. Information in organizations can be set up to request acknowledgement of receipt by users for documentation purposes. To request an organization, fill out an organization request form.

Working outside TWU
  • Qlubb offers event calendaring, sign up sheets, photo sharing, member rosters, file sharing, task reminder service, group invites and RSVPs, and bulletin boards.

  • Wiggio offers file sharing and editing, group calendars, polling, posting of links, conference calls, chatting online, mass texting, as well as voice and email messages to the group. Each member can determine their communication preferences.
Thank you to Professor Patricia Nunn, Department Chair, Dental Hygiene Program for this question.

Web 2.0 tools are available to anyone with internet access. Each Web 2.0 tool website offers information about that tool including support options, if available.

Wednesday, September 22, 2010

Tip #79: Freezing Grade Center Columns

Tip: In Blackboard 9’s Grade Center, you can freeze the leftmost columns in place so they do not move while horizontally scrolling through the Grade Center. For example, the columns containing the students’ first and last names are frozen by default.

Here’s how to Freeze Columns:
  1. Log into your course and ensure Edit Mode is ON.

  2. Click on the Grade Center area of the Control Panel then select Full Grade Center in the expanded menu.

  3. On the Grade Center page, click on the Manage button and then select Column Organization from the dropdown menu.

  4. Drag the row related to the column you would like to freeze above the dark grey bar that states “Everything above this bar is a frozen column”.

  5. Click Submit.

Here’s how to Unfreeze Columns:
  1. Log into your course and ensure Edit Mode is ON.

  2. Drag the row related to the column you would like to unfreeze below the dark grey bar that states “Everything above this bar is a frozen column”.

  3. Click Submit.

Monday, September 20, 2010

Tip of the Week: Organizing Team Projects

Web 2.0 Tools: Central Desktop, Comindwork, or AceProject
Projects can include sharing files, timelines, charts, graphs, discussions, meetings, and more. Projects may be faculty research, staff office projects, departmental accreditation, or even group projects within classes. There are many Web 2.0 tools that offer helpful tools to work within teams both inside the TWU community and with those outside the university.

What’s the difference?

  • Comindwork offers member management, invites, project blogs, wikis, milestones, time logging, file sharing, cases/issues, history, search, and reports. The free account offers 1 active project, unlimited users, and 20 MB file storage. All accounts offer the following:

    Collaboration: to-do lists, milestones, discussions, tickets, time tracking, RSS, reminders, notifications

    Knowledge management: enterprise wiki, documents, blog, files storage, tagging, linking, versions

    Tools: charts, reports, reply and upload by email, rich editor, video reply, semantic search, export/import
  • Ace Project includes projects, tasks, documents, calendars, statistics, forums, time reports, task reports, time approval, notes and Gantt charts. The free account offers up to 5 users, 5 projects, 50 MB of storage space.
  • Central Desktop offers wikis, databases, project blogs, and user forums. The free account offers 2 workspaces, up to 5 members per workspace, 25 MB of space, as well as audio conferencing and SSL (256 bit encryption).
Thank you to Jacqueline Folsom, Program Coordinator, Associate Provost Office for this question.

Wednesday, September 15, 2010

Tip #78: Blackboard 9 Grade Center's Smart Views

Tip: In Blackboard 9, you can create different views of your Grade Center which allow you to filter which students you view, the columns you view, or a combination of both which you can then switch to using the Current View dropdown.

Smart Views are useful for sorting groups of students. For example, if you have assigned individual graders specific students, you can create a different Smart View for each grader. If you have combined multiple sections into one Blackboard shell, you can create a Smart View for each section.

Here's how to create a Grade Center Smart View:
  1. Log into your course and ensure Edit Mode is ON.

  2. Click on the Evaluation area of the Control Panel then select Grade Center in the expanded menu.

  3. On the Grade Center page, click on the Manage button and then select Smart Views from the dropdown menu.

  4. On the Smart Views page, click on the Add Smart View button.

  5. On the Create Smart View page, enter a name (required) and description (optional) then select a Type of View from one of the following:
    • Group (select individual groups)
    • Benchmark (select users based on performance criteria)
    • Focus (select individual users)
    • Investigate (a combination of the first three)

  6. Select the criteria you would like to use to limit users.
    • NOTE: If you would like to create a view that only limits which columns you view but includes all students, select Benchmark for your view type and then make the criteria "Grade on Total Greater than or Equal to" 0.

  7. Use Filter Results to choose which columns you would like to view.

  8. Click Submit then OK. Your new Smart View will now be an option on the Current View dropdown located on the the light blue filter bar.
    • NOTE: If you do not see the Current View dropdown, click on the Filter button on the bottom right of the Grade Center header field.

    • NOTE: You can make your commonly-used Smart Views favorites by clicking on the star in the Add as Favorite column so that it is green rather than grey. It will then appear in the Grade Center dropdown of the Control Panel.

Monday, September 13, 2010

Tip of the Week: Managing Multiple Schedules

Applications: Outlook Web 2.0 Tools: Tungle & Doodle
Scheduling a meeting with multiple people can be challenging. Finding a time that works for everyone is the first step. To manage multiple schedules, there are several technology tools available.

Within the TWU Community

Microsoft Outlook calendars offer schedule availability options. Each faculty and staff member can designate times as busy, free, tentative, or out of the office.
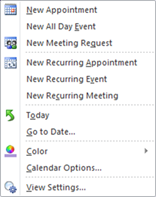
To schedule a meeting in Outlook:
  1. Click on the calendar tab in the navigation pane
  2. Select the date for the meeting
  3. Right-click to open the dialog box and choose an option such as New Appointment, New All Day Event, New Meeting Request, etc.
  4. A new dialog box will open. Select options for title, location, length of meeting, reminders, importance, etc.
When inviting others to a meeting with a meeting request, they are given the option to accept, decline, or mark tentative. The meeting request then keeps track for you of who has responded and how.

Outside the TWU Community

When working with a group of people from outside the campus, there are Web 2.0 tools available to use in scheduling. Tungle and Doodle are web based applications that have free account options.

Tungle synchronizes several calendars of different types including Google apps and Microsoft Office Outlook. Tungle can be accessed using accounts you may already have including Facebook, Twitter, and LinkedIn. Tungle also offers an app for smartphone users.

Doodle synchronizes calendars of different types including Google, Microsoft Office Outlook, ICal, Yahoo, and Live. Registration is optional. Doodle also offers an app for smartphone users.

Thank you to Matt Moustakas, Director of Environmental, Safety & Health, Facilities Management & Construction for sharing these tools!

Wednesday, September 8, 2010

Tip #77: Copying Course Materials by Exporting and Importing

Tip: You can copy materials into a Blackboard 9 course from previous courses by Exporting and Importing (from BB7 to BB9 and from BB9 to BB9).
  • NOTE: This process does not overwrite your Blackboard 9 course entirely but rather add the material you are importing into it. You may need to rearrange or remove some items after the import process has fully completed.

Here’s how to Export and Import:

Part I Export
  1. Log into the source course from which you will be copying the material.

  2. Go to Export/Archive page.
    • Blackboard 7: Click on Control Panel then on Export Course under the Course Options section

    • Blackboard 9: Click on the Packages and Utilities section of the Control Panel and then on Export/Archive Course

  3. Click on the Export button and select all Course Materials that you would like to export.
    • NOTE: Do not select Settings as this will cause some parts of your Blackboard 9 course to be disabled.

    • NOTE: If you select any Assessments, Assignments, or graded Discussions, then you must also select Gradebook Items (Grade Center Columns in BB9).

      Likewise, if you select Gradebook Items (Grade Center Columns in BB9), then you must select Assessments, Assignments, and Discussions.

  4. Click Submit. At this point, you should receive a message that states “This action has been successfully queued. An email will be sent when the process is complete.”
    • NOTE: You should receive this email within 2-3 hours. If that does not happen, please contact Blackboard Support (blackboard@twu.edu).

  5. Once you receive the confirmation email, return to the Export/Archive page then right-click and save the new Export file to a location where you can easily find it such as your desktop.

Part II Import
  1. Log into the destination course.

  2. Click on the Packages and Utilities section of the Control Panel and then on Import Package/View Logs.

  3. Click on the Import Package button.

  4. Under Select a Package, click on the Browse button, browse to where you saved the Export file on your computer, select the file, and click on Open.

  5. Select all Course Materials that you would like to import.
    • NOTE: Do not select Settings as this will cause some parts of your Blackboard 9 course to be disabled.

    • NOTE: If you select any Assessments, Assignments, or graded Discussions, then you must also select Gradebook Items (Grade Center Columns in BB9).

      Likewise, if you select Gradebook Items (Grade Center Columns in BB9), then you must select Assessments, Assignments, and Discussions.

  6. Click Submit. At this point, you should receive a message that states “Success: This action has been queued. An email will be sent when the process is complete.”
    • NOTE: You should receive this email within 2-3 hours. After you receive this email, it could take up to another 8 hours for the new content to fully display. If either part does not happen, please contact Blackboard Support (blackboard@twu.edu).

Wednesday, September 1, 2010

Tip #76: Enrolling and Removing Students from a Course

Tip: You can enroll students, remove students, and limit a dropped student’s access
  • NOTE: Official university student rosters can be obtained from WebAdvisor and compared with Blackboard rosters.
Enrolling a student:
You can enroll students who are on the official university student rosters but not on the Blackboard roster.
  1. Access your course

  2. Click on the Users and Groups area of the Control Panel and select Users

  3. Click on Enroll Users

  4. On the Add Enrollments page, enter the student’s username and click on Submit

Removing students from a course:
You can remove students who are not enrolled in the course per your WebAdvisor roster. Keep in mind that all student data will be removed including grades, assignment submissions, and course statistics. If a student has dropped the course, consider limiting their access so that you may retain their student data.
  1. Access your course

  2. Click on the Users and Groups area of the Control Panel and select Users

  3. Select the students you would like to remove from your course

  4. Click on Remove Users from Course

Limiting a student’s access and retaining student information:
If a student has dropped the course, you can limit their access to the course while retaining all student data, including grades, for that student.
  1. Access your course

  2. Click on the Users and Groups area of the Control Panel and select Users

  3. Click on the action link next to the student’s username and select Change User’s Availability in Course

  4. Select No from the dropdown next to Available (this course only)

  5. Click on Submit

Monday, August 30, 2010

Voicemail Tip of the Week: Phone Commands

Voicemail
Voicemail offers the option to set an Out of Office greeting and status that can be set to give callers information about your absence. Check for procedures within your department for specific items to be included in your greeting such as information about dates of absence and return, regular office hours, and when they can expect a return phone call. Your department may also ask you to offer website information if that is an acceptable means of information for callers. It is recommended that each person updates their greeting, and offices should be sure the main departmental line is updated when hours are changed. Upon return to work, be sure to switch back to the regular greeting and status. Step-by-step instructions for Out of Office messages

Phone Forwarding

As a courtesy to callers, be sure to forward each voicemail enabled phone immediately to voicemail. This quickly gives information to callers. Upon return work, be sure to clear immediate forwarding and reset as appropriate for your office. Step-by-step instructions for Phone Forwarding.

Outlook Email

Microsoft Office Outlook’s Out of Office Assistant can be used to automatically respond to email messages in the event of an absence. The Out of Office Assistant can respond differently to emails within and outside of TWU. Check for specific procedures within your department for specific items to be included in your Out of Office replies such as dates of absence and return, an alternative point of contact, and when to expect a response. Your department may also ask you to offer website information if that is an acceptable means of information for inquiries. Upon return to work, be sure to remove the automatic response. Step-by-step instructions on using Outlook's Out of Office Assistant.

Note:
Visit our blogpost to find out how to Set Out of Office using Outlook Web Access.

NOTE: Remember to remove the out of office status on your e-mail & voicemail. Removing out of office must be done on both voicemail and e-mail.


Voicemail is available for all permanent faculty and staff.
To setup an account e-mail voicemail@twu.edu from your TWU e-mail account and include name, campus and telephone extension.

Want more information? Call the TWU Helpdesk (940) 898-3971

Wednesday, May 26, 2010

Tip #75: Naming Files for Blackboard

Tip: You can reduce the number of error messages you and students receive when opening files by appropriately naming files uploaded to Blackboard.


How to do it:


There are several file name characters that may lead to error messages when instructors or students upload or download files. To reduce the occurrence of those errors, follow these naming conventions:
  • Use only letters, numbers, underscores, and hyphens in file names
  • Use hyphens or underscores in place of spaces in file names
  • Do not use periods in a file name, except before the file extension (e.g. “Name_test1.doc”)
  • Do not use spaces, commas, pound signs (#), question marks, equal signs, ampersands (&), asterisks (*), or any other special characters in file names
  • Keep file names under 60 characters in length
NOTE: You may recommend to students that they follow these same naming conventions. This is helpful when you are downloading multiple students’ files at once (E.g. downloading students’ completed assignments).

Wednesday, May 19, 2010

Tip #74: Copying Course Materials by Exporting and Importing

Tip: You can copy materials into a Blackboard 9 course from previous courses by Exporting and Importing (from BB7 to BB9 and from BB9 to BB9).
  • NOTE: This process does not overwrite your Blackboard 9 course entirely but rather add the material you are importing into it. You may need to rearrange or remove some items after the import process has fully completed.

Here’s how to Export and Import:

Part I Export
  1. Log into the source course from which you will be copying the material.

  2. Go to Export/Archive page.
    • Blackboard 7: Click on Control Panel then on Export Course under the Course Options section

    • Blackboard 9: Click on the Packages and Utilities section of the Control Panel and then on Export/Archive Course

  3. Click on the Export button and select all Course Materials that you would like to export.
    • NOTE: Do not select Settings as this will cause some parts of your Blackboard 9 course to be disabled.

    • NOTE: If you select any Assessments, Assignments, or graded Discussions, then you must also select Gradebook Items (Grade Center Columns in BB9).

      Likewise, if you select Gradebook Items (Grade Center Columns in BB9), then you must select Assessments, Assignments, and Discussions.

  4. Click Submit. At this point, you should receive a message that states “This action has been successfully queued. An email will be sent when the process is complete.”
    • NOTE: You should receive this email within 2-3 hours. If that does not happen, please contact Blackboard Support (blackboard@twu.edu).

  5. Once you receive the confirmation email, return to the Export/Archive page then right-click and save the new Export file to a location where you can easily find it such as your desktop.

Part II Import
  1. Log into the destination course.

  2. Click on the Packages and Utilities section of the Control Panel and then on Import Package/View Logs.

  3. Click on the Import Package button.

  4. Under Select a Package, click on the Browse button, browse to where you saved the Export file on your computer, select the file, and click on Open.

  5. Select all Course Materials that you would like to import.
    • NOTE: Do not select Settings as this will cause some parts of your Blackboard 9 course to be disabled.

    • NOTE: If you select any Assessments, Assignments, or graded Discussions, then you must also select Gradebook Items (Grade Center Columns in BB9).

      Likewise, if you select Gradebook Items (Grade Center Columns in BB9), then you must select Assessments, Assignments, and Discussions.

  6. Click Submit. At this point, you should receive a message that states “Success: This action has been queued. An email will be sent when the process is complete.”
    • NOTE: You should receive this email within 2-3 hours. After you receive this email, it could take up to another 8 hours for the new content to fully display. If either part does not happen, please contact Blackboard Support (blackboard@twu.edu).

Wednesday, May 12, 2010

Tip #73: Copying Course Materials

Tip: You can copy materials into a Blackboard 9 course from previous courses by using Course Copy (from BB9 to BB9 only).
  • NOTE: This process does not overwrite your Blackboard 9 course entirely but rather adds the material you are importing into it. You may need to rearrange or remove some items after the copy process has completed.

How to Course Copy:
  1. Log into the course from which you will be copying the material.

  2. Click on the Packages and Utilities section of the Control Panel and then on Course Copy.

  3. Under Select Copy Options, click on the Browse button next to Destination Course ID. In the Course window that pops, select your destination course, and click Submit.

  4. Select all the Course Materials that you would like to copy.
    • NOTE: Do not select Settings if you are copying from a course which was formerly on BB7 as this will cause some parts of your new Blackboard 9 course to be disabled.

    • NOTE: If you select Assessments, Assignments, or graded Discussions, then you must also select Grade Center Columns.

      Likewise, if you select Grade Center Columns, then you must select Assessments, Assignments, and Discussions.

  5. Click Submit. At this point, you should receive a message that states “Success: Course copy action queued. An email will be sent when the process is complete.”
    • NOTE: You should receive this email within 2-3 hours. After you receive this email, it could take up to another 8 hours for the new content to fully display. If either part does not happen, please contact Blackboard Support (blackboard@twu.edu).


Monday, May 10, 2010

Web 2.0 Tool of the Week: Aviary

(http://www.Aviary.com)
Aviary is a suite of powerful graphic creation applications that you can use directly in a web browser. Aviary offers an open canvas from which users can create, edit, and develop their artistic visions. From novice to artist, anyone can create using Aviary and the variety of tools they offer.

About Aviary
  • Basic account is free; paid account offers full access to the entire suite of applications, enhanced file sharing and collaboration, full watermark control, and unlimited storage.
  • Programs in the tool include:
    • Phoenix- layer-based image editor, comparable to Photoshop
    • Peacock- visual laboratory for creating amazing effects and visualizations
    • Toucan- customized color palette coordinator
    • Raven- vector image editor, comparable to Illustrator
    • Falcon- basic image markup with shapes and text, similar to Smart Art in Office
    • Myna- audio editor, comparable to Audacity
    • Talon- Firefox extension that allows users to perform screen capturing

Why use Aviary?
  • Photo-editing
  • Create logos or original illustrations
  • Create a course banner
  • Create or edit images for presentations

Ready to explore Aviary?
Sign up for an account here.

Already using Aviary?

Share with us a creation you’ve made on Aviary in this post's comments..

Wednesday, May 5, 2010

Tip #72: Blackboard 9 Upgrade Frequently Asked Questions

Tip: We will begin using Blackboard 9 for all classes beginning June 2010. Summer, Summer 2 and Summer 3 classes will be available on the new version of Blackboard. Summer 1 (formerly Maymester) will be taught on the current version of Blackboard. Here are the answers to some Frequently Asked Questions about Blackboard 9

Can I see what BB9 looks like before summer?
The new Blackboard server is available at http://twupilot.blackboard.com. You are also invited to attend the BB9 classes being offered to faculty, staff, adjuncts and GA’s. See our upcoming classes.

When will we start using Blackboard 9?

Blackboard 9 will be used beginning in June with Summer, Summer 2 and Summer 3 courses.

When will all my old courses be moved from BB 7 to BB9?
Courses containing content from the following semesters have been moved and should be visible on the new server:
  • 08SP
  • 08SU – all terms including maymester
  • 08FA
  • 09SP
  • 09SU – all terms including maymester
  • 09FA
10SP courses have not been moved so that all content can be included and will be moved once grades have been submitted. They should be available by the end of May.

You should be able to view all these courses on the BB9 server (http://twupilot.blackboard.com). If you are not seeing courses please contact Blackboard Support at blackboard@twu.edu.

When will my Spring 2010 courses be moved to the BB9 server?

In order to ensure that your entire course is moved, Spring 2010 courses should be available to you by the end of May.

Is it possible to move my Spring 2010 class earlier?
You can use the Export function in the course to export your course and then use the Import function in Blackboard 9. For more complete directions see: http://www.twu.edu/downloads/blackboard/BB9_Importing_a_Course_from_Blackboard_7.pdf

Will I need to give this address (http://twupilot.blackboard.com) to my students?
No, on June 4 all existing links (http://twu.blackboard.com, http://online.twu.edu) to Blackboard will automatically go to the new server.

I usually send e-mails to my students before the semester starts. Can I still do this?
Yes, you can send an e-mail from your course in Blackboard 9 (http://twupilot.blackboard.com)

Will organizations be moved to Blackboard 9?
Yes, we are in the process of moving all organizations with content to Blackboard 9. All organizations should be available in BB9 by the end of May.

Will I still have access to Blackboard 7?
Yes, it will be available through the beginning of Fall 2010; the exact date will be announced via e-mail. We will send a link to the BB7 location in June.

When will students have access to the new Blackboard?
Students will have access to Blackboard 9 beginning June 4.

Monday, May 3, 2010

Web 2.0 Tool of the Week: Diigo

(http://www.Diigo.com)
Diigo is a social bookmarking and annotation site for people to discover and share web content. Users can highlight content directly on web pages and post sticky notes for additional commenting. The site allows users to “like” a site, share a site by email, categorize sites, and comment on various items posted. Content can be public or private. Educators can apply for a special free account to use with student groups.

Account Information
:
  • Diigo accounts are free
  • Accounts can be connected to other social networking sites such as Facebook or Twitter

Why use Diigo?
  • Discover popular web sites
  • Collaborate on research and projects
  • Enhance class communication using web content
  • Submit your favorite web content
  • Bookmarks can be “tagged” for easier searching
  • Search with terms of your choice
  • Information can be accessed anywhere with internet connectivity

Ready to explore Diigo?
Sign up for an account here

Already using Diigo?

Tell us other things you like about Diigo in this post's comments

Wednesday, April 28, 2010

Tip #71: Upcoming BB9 Classes

Tip: You now have more opportunities to learn about Blackboard 9 and receive a sandbox course by attending a Blackboard 9 class.

TWU will begin using Blackboard 9 for Summer, Summer 2 and Summer 3* session courses. Faculty and staff wanting to orient to the new interface prior to June may access Blackboard 9 at http://twupilot.blackboard.com

You can register for classes or request a small group session for your department at http://www.twu.edu/blackboard/13232.asp

What’s New in Blackboard 9
Blackboard 9 has a completely revised web 2.0 user interface and many exciting new features. This facilitated, hands-on workshop will introduce participants to the most significant changes and new features of Blackboard 9.

Tuesday, May 4 – 9:00 – 10:00 a.m. SH 307
Wednesday, May 19 – 12:00 – 1:00 p.m. ACT 503
Thursday, June 3 – 10:00 – 11:00 a.m. SH 307
Tuesday, June 8 – 11:00 a.m. – 12:00 p.m. SH 307

What’s New in BB9 Webinars
Blackboard 9 has a completely revised web 2.0 user interface and many exciting new features. Join us online in an Adobe Connect Session to explore the most significant changes and new features of Blackboard 9.

Thursday, May 20 – 12:00 p.m.
Thursday, May 27 – 1:00 p.m.
Thursday, June 10 – 10:00 a.m.

The Blackboard 9 Grade Center Webinars
This Adobe Connect Session will introduce participants to the new Grade Center. Join us online to learn how to access the Grade Center to add score columns and to enter and manage student grades. Participants will also be introduced to new features such as Smart Views, Grade History, and Calculated Columns.

Friday, May 7 – 10:00 a.m.
Friday, May 21 – 1:00 p.m.
Friday, May 28 – 12:00 p.m.
Friday, June 10 – 10:00 a.m.

*Summer Semester Names

Old New Description
Maymester Summer 1 14-day May classes
Summer 1 Summer 2 June classes
Summer 2 Summer 3 July classes
Summer 3 Summer All summer long (beginning June)

Monday, April 26, 2010

Voicemail Tip of the Week: Phone Commands

TWU’s new voicemail system is integrated with email. Voicemail messages are automatically delivered to your email inbox. Messages can be accessed by phone, or by email, whichever is preferred. When accessing the system by phone, keystrokes are used to perform functions. Some of the commonly used functions are listed below.

To access the voicemail system from your office phone:
Denton: call 4646, press #, enter security code
Dallas & Houston: call 81 4646, press #, enter security code

Listen to new press 1, 1
Listen to saved press 1, 2
Save a messagepress 1
Fwd a messagepress 2
Delete a messagepress 7
Reply to a messagepress 5, 2
Call back the sender of a messagepress 5, 1
To bypass a greetingpress #
To record a greetingpress 5, 4, 1
Listen to greetingpress 5, 4, 2
Change security codepress 5, 5, 3
Time/date message stampAutomatically read
Log out of boxhang up

Important Note: Voicemail and e-mail are integrated on this system. Voicemail messages are automatically delivered to your email inbox. Messages can be accessed by phone, or by email, whichever is preferred.

During message playback, there are several features available:

Save current message..................... 1
Forward message to extension....... 2
Skip to next message..................... 3
Replay current message................. 4
Rewind message 6 seconds........... 5
Fast forward message 6 seconds... 6
Delete this message, play next....... 7

Features available at all times:

Return to a previous menu............. *
Finish a key entry........................... #

Voicemail is available for all permanent faculty and staff. To setup an account, e-mail voicemail@twu.edu from your TWU e-mail account and include name, campus and telephone extension.

Want more information?
Call the TWU Helpdesk (940) 898-3971

Wednesday, April 14, 2010

Tip #70: Blackboard 9 Grade Center's Smart Views

Tip: In Blackboard 9, you can create different views of your Grade Center which allow you to filter which students you view, the columns you view, or a combination of both.

Here’s how to create a Grade Center Smart View:

  1. Log into your course and ensure Edit Mode is ON.

  2. Click on the Evaluation area of the Control Panel then select Grade Center in the expanded menu.

  3. On the Grade Center page, click on the Manage button and then select Smart Views from the dropdown menu.

  4. On the Smart Views page, click on the Add Smart View button.

  5. On the Create Smart View page, enter a name (required) and description (optional) then select a Type of View from one of the following:
    • Group (select individual groups)
    • Benchmark (select users based on performance criteria)
    • Focus (select individual users)
    • Investigate (a combination of the first three)

  6. Select the criteria you would like to use to limit users.
    • NOTE: If you would like to create a view that only limits which columns you view but includes all students, select Benchmark for your view type and then make the criteria “Grade on Total Greater than or Equal to” 0.

  7. Use Filter Results to choose which columns you would like to view.

  8. Click Submit then OK. Your new Smart View will now be an option on the Current View dropdown located on the yellow action bar.

Wednesday, April 7, 2010

Tip #69: Viewing the course roster in Blackboard 9

Tip: In Blackboard 9, you can access your course roster through the Control Panel.

Here’s how to drag and drop:

  1. Log into your course and ensure Edit Mode is ON.

  2. Click on the Users and Groups area of the Control Panel.
Users and Groups
  1. Click on Users in the expanded menu.

  2. In the Search bar, select the Not blank search option.
Not Blank
  1. Click on Go, and your course roster will appear.

Monday, April 5, 2010

iPhone Apps of the Month: Web 2.0 Tools

The iPhone offers applications (Apps) that can be downloaded for a variety of uses. Apps can range from free to varying costs, and range in topic from business, education, weather, productivity, news, and more. Many of the Web 2.0 Tools we’ve shared have a correlating iPhone app. These are just some of the many iPhone apps that can be on both computer and iPhone.

Tweetie, twitterific, twitbird, twittervision, echofon
Twitter, a micro blogging tool, allows users to post messages of up to 140 characters. Users can post via the web, IM, or a mobile phone.
See the Tip: http://twu-tips.blogspot.com/2009/09/web-20-tool-of-week-twitter.html

Facebook
Facebook is a popular social networking site. Facebook can be used to network with friends, colleagues or classmates. People all over the world are using this application. People can “friend” each other to allow access to content.
See the Tip: http://twu-tips.blogspot.com/2009/10/web-20-tool-of-week-facebook.html

Evernote
Evernote is an organization tool which stores notes, documents, websites and images. The information can be accessed from any computer or smart phone.
See the Tip: http://twu-tips.blogspot.com/2010/02/web-20-tool-of-week-evernote.html

Flickr
Flickr is an online image management and sharing tool. Users can share images and short videos, join groups, and comment on other’s pictures.
See the Tip: http://twu-tips.blogspot.com/2009/12/web-20-tool-of-week-flickr.html

Animoto
Animoto is an online application that instantly produces videos using pictures, video, text, and sound. Animoto allows you to drag and drop pictures in the order you want to view them, select a song and the program integrates the two for a professional-looking video.
See the Tip: http://twu-tips.blogspot.com/2009/11/web-20-tool-of-week-animoto.html

Delicious
Delicious is a social bookmarking service that allows users to tag, save, manage and share web pages from a centralized source. Users can bookmark any site on the Internet, and access from anywhere.
See the Tip: http://twu-tips.blogspot.com/2010/01/web-20-tool-of-week-delicious.html

iPhone apps can be downloaded via the iPhone app store

Wednesday, March 31, 2010

Tip #68: Drag and Drop in Blackboard 9

Tip: In Blackboard 9, you can use drag and drop to arrange and reorder items.

What can you drag and drop?

You can drag and drop any item that has either a double-headed arrow or a four-headed arrow to the left of it. Here are some prominent places you will see them:
  • the Course Menu
  • Content pages
  • the Announcement page
  • the Column Organization page

Here’s how to drag and drop:
  1. Use your mouse to left-click and hold on the arrows next to an item you would like to move.
    • NOTE: Your mouse pointer will turn into a four-headed arrow when your mouse is properly positioned over the arrows.

  2. Drag the item up or down to the spot where you would like to place it.

  3. Release your left mouse button to drop the item in place.

Monday, March 29, 2010

Web 2.0 Tool of the Week: Screenr

(http://www.Screenr.com)
Screenr is a web-based tool that provides creation of screencasts without installing any software. Screen activity is recorded along with narration from a microphone.

Account Information:
  • A Twitter (free) ID is needed to log in to Screenr to record screen casts or comment on them

Features of Screenr:
  • Screenr publishes screen casts in high-definition Flash format
  • Screenr recordings can be shared on Twitter, YouTube or anywhere else on the web
  • iPhone users can view a screen cast
  • The number of screen cast recordings is unlimited

Considerations for using Screenr:
  • All screen casts are public
  • Screenr records only your primary display

Why use Screenr?
  • Capture information from the internet to share with students
  • Demonstrate how to use software
  • Use clips as part of a presentation

Ready to explore Screenr?
Sign up for an account here.

Already using Screenr?
Tell us how Screenr has worked for you in this post's comments.

Wednesday, March 24, 2010

Tip #67: Hiding the Course Menu in Blackboard 9

Tip: In Blackboard 9, you can temporarily hide your Course Menu so that it’s easier to read content on a small screen
  • NOTE: Toggling Course Menu availability affects the display for all of your courses and only your courses. Hiding or Showing the Course Menu will not affect whether it’s viewable to the students in your course.

Hiding the Course Menu:
Click on the Hide Button button that is to the right of the Course Menu as indicated below to hide the course menu.
Hide Show
Click to Hide Click to Unhide


Showing the Course Menu:
Click on the Show Button button that is on the left edge your browser as indicated above to show the course menu.

Tuesday, March 23, 2010

Microsoft Office Tip of the Week: Recent Document List

Applications: Word, Excel, PowerPoint

Many Microsoft Office programs display the last few files opened in that program. The list of recently documents can be customized to adjust the number of files or specific files that it displays.

Change the number of files that appear in the list of recent documents

  1. Click the Microsoft Office Button Button image, and then click (Excel, PowerPoint, or Word) Options.

  2. Click Advanced.

  3. Under Display, in the Show this number of Recent Documents list, click the number of files that you want to display.

To keep documents on the Recent Documents List:
  1. Click the Microsoft Office Button Button image.

  2. Click Pin this document to the Recent Documents list Button image.

Note: When a document is pinned to the Recent Documents list, the pin button looks like a push pin viewed from the top: Button image.

To undo this feature, push the Button image again, and it will appear as Button image.

Wednesday, March 10, 2010

Tip #66: Blackboard 9 Edit Mode

Tip: In Blackboard 9, you can make changes to content from within the course view by turning Edit Mode: ON. When viewing a course with Edit Mode: OFF, you will have the same view as student, viewing only available menu items and content areas.

Edit Mode On:
Toggle Edit Mode to On by clicking the Edit Mode Button on the upper right-hand side of the screen. When in edit mode:
  • the button will read Edit Mode: ON
  • the background of the course will display grey diagonal lines
Edit Mode On


Edit Mode Off:

To toggle Edit Mode to Off, you click the same Edit Mode Button on the upper right-hand side of the screen. When edit mode is off:
  • the button will read Edit Mode: OFF
  • the background of the course will be clear of grey diagonal lines
Edit Mode Off

Monday, March 8, 2010

Web 2.0 Tool of the Week: Digg

(http://www.digg.com)
Digg is a social bookmarking site place for people to discover and share web content. Digg is organized into categories based on topics. All content is submitted by Digg users. Once something is submitted, other people see it and “Digg” (rate) the sites they feel are most relevant. If your submission receives enough Diggs, it is promoted to the front page for visitors to see.

Account Information:
  • Digg accounts are free
  • Accounts can be connected to other social networking sites

Why use Digg?:
  • Discover popular news
  • Submit your favorite web content
  • Check the homepage for popular stories
  • Use Digg to promote sites you find relevant and important
  • Subscribe to RSS feeds of particular topics, popular/upcoming sections, individual users
  • Search with terms of your choice
  • Build a network of friends or find them on Digg and add them to your friends list
  • Share popular articles with friends
  • Share your opinions by commenting on stories, images, and videos

Ready to explore Digg?
Sign up for an account here.

Already using Digg?
Tell us what you like on Digg.

Wednesday, March 3, 2010

Tip #65: Blackboard 9 Classes

Tip: You can learn about Blackboard 9 and receive a sandbox course by attending a Blackboard 9 training session.

You can access Blackboard 9 at
http://twupilot.blackboard.com

You can register for classes or request a small group session for your department at
http://www.twu.edu/professional-development


What’s New in Blackboard 9

Blackboard 9 has a revised user interface and many exciting new features. This facilitated, hands-on workshop will introduce participants to key changes and new features of Blackboard 9.

Thursday, March 4 – 12:30 – 1:30 p.m. SH 307
Tuesday, March 9 – 2:00 – 3:00 p.m. SH 308
Wednesday, March 10 – 11:00 a.m. – 12:00 p.m. SH 307
Tuesday, March 30 – 3:00 – 4:00 p.m. SH 307
Friday, April 2 – 11:00 a.m. – 12:00 p.m. SH 307
Monday, April 5 – 1:00 – 2:00 p.m. SH 307
Thursday, April 8 – 3:30 – 4:30 p.m. SH 307

What’s New in BB9 Webinars
Join us for a What’s New session online from the location of your choice. Upon registering for the webinar, you will receive a link to access the session.

Friday, March 5 – 10:00 a.m.
Friday, March 12 – 11:00 a.m.
Friday, April 9 – 12:00 p.m.
Friday, April 30 – 1:00 p.m.

The Blackboard 9 Grade Center
This hands-on, facilitated workshop will introduce participants to the new Grade Center.

Wednesday, April 7 – 10:00 – 11:00 a.m. SH 307
Tuesday, April 13 – 3:00 – 4:00 p.m. SH 307
Thursday, April 15 – 11:00 a.m. – 12:00 p.m. SH 307
Wednesday, April 28 – 10:00 – 11:00 a.m. SH 307
Thursday, April 29 – 10:00 – 11:00 a.m. SH 307

Enhancing Communication
This hands-on, facilitated workshop will focus on how to use select Blackboard 9 communication tools effectively to increase student engagement within a course.

Wednesday, April 14 – 11:00 a.m. – 12:00 p.m. SH 307
Monday, April 26 – 2:00 – 3:00 p.m. SH 307

Creating Assessments & Assignments
This hands-on, facilitated workshop will emphasize the features and functions of Blackboard 9’s assessments and assignments tools.

Monday, April 12 – 2:00 – 3:00 p.m. SH 307
Monday, April 27 – 12:30 – 1:30 p.m. SH 307

Wednesday, February 24, 2010

Tip #64: Grade Discussion Board Forums or Threads

Tip: You can grade Discussion Board forums or threads.

Here’s how to enable grading:

  1. Go to the Blackboard Control Panel, and click on Discussion Board

  2. Choose the specific Discussion Board containing the Forum you would like to grade

  3. Click the Modify button for the Forum you would like to grade

  4. Under Forum Settings, select Grade Forum or Grade Threads
    1. Grade Forum will allow you to assign grades for students’ posts to that forum
    2. Grade Threads will allow you to assign grades for students’ replies to each thread in a forum

Here’s how to grade:
  1. Click the Grade icon next to the forum or thread you would like to grade

  2. Click the Grade button next to a student’s name
    1. The student’s posts to the forum or thread will display
    2. You can filter, sort, and print the student’s posts

  3. Type a grade in the Grade box and click the Submit button

Discussion grading and the gradebook:

It is important to note that when you enable grading for a forum or thread, columns for those forums or threads are automatically generated in the gradebook.
  • When you enable grading by forum, a column for that forum is created in the gradebook
  • When you enable grading by thread, a column for each thread in a forum is created in the gradebook
Keep this in mind when choosing whether to grade by forum or thread. Gradebook management can become cumbersome if you choose to grade a large number of threads.

Monday, February 22, 2010

Voicemail Tip of the Week-Phone Forwarding

TWU has a new voicemail system for all permanent faculty and staff. The new system integrates voicemail with e-mail, delivering all messages to both telephone and e-mail. To request an account on the new system, e-mail voicemail@twu.edu and include your name, campus, and telephone extension.

Since the transition phase to the new system has occurred, the old system will be taken offline Friday, February 26th 2010 at 10 am. Please be sure to clear any messages from your mailbox on the old system. Due to technical differences in the old and new system, messages will not transfer. When you have set up your box on the new system, clear out your box on the old system and send request to voicemail@twu.edu to have it deleted.

Each person must set phone forwarding to voicemail. If the phone is not forwarded to voicemail, the phone will just ring.

Always start by clearing the phone of both types of forwarding. Do both of these steps:

To clear all call forward
  1. Pick up the receiver.
  2. Press # 1.
  3. Hang up B.
To clear partial forward
  1. Pick up the receiver.
  2. Press # 2.
  3. Hang up B.

B When using a display multi line phone, FWD CNCL will appear.

Then, choose the type of forwarding desired and forward the phone to voicemail. There are two types of phone forwarding available: partial and all. If partial forwarding is set, voicemail answers after several rings or immediately if busy. If all call forwarding is set, all calls to that extension are immediately forwarded to voicemail. Choose one of these steps:

To set all partial forward
  1. Pick up the receiver.
  2. Press * 2 4646.
  3. Hang up A.
To set all forward
  1. Pick up the receiver.
  2. Press * 1 4646.
  3. Hang up A.

A When using a display multi line phone, FWD SET will appear.

When calling campus extensions using a display multi line phone, the phone system will display the type of forwarding set.
  • FDB indicates that voicemail has answered the call due to busy status.
  • FDN indicates that voicemail has answered the call due to no answer.
  • FDA indicates that voicemail has answered because all calls are forwarded.
Voicemail is available for all permanent faculty and staff. To setup an account, e-mail voicemail@twu.edu from your TWU e-mail account and include name, campus and telephone extension.

Wednesday, February 17, 2010

Tip #63: Partial Credit Test Questions

Tip: When creating a test, you can set some questions to allow for partial credit by following a two-step process that includes first enabling the option on a test level, and then setting the option on a question level.

Question types:

While all manually-graded questions can be assigned partial credit, only the following automatically-graded questions allow it:
  • Calculated Formula
  • Fill in Multiple Blanks
  • Jumbled Sentence
  • Matching
  • Multiple Answer
  • Multiple Choice
  • Opinion Scale/Likert
  • Ordering
  • Quiz Bowl

Here’s how to do it:

Part 1 — Enable the option on the test level:
  1. Go to the Blackboard Control Panel, and click on Test Manager.
  2. Click on the Modify button to the right of the test containing the questions you plan to make partial credit. This will take you to the Test Canvas page.
  3. Click on the Creation Settings link.
  4. Scroll down to the Scoring subsection, and check the box correlating to “Specify partial credit options for answers”.
  5. Scroll to the bottom of the page, and click Submit and then OK.

Part 2 Set the option on the question level:
  1. Click on the Modify button to the right of the question you plan to make partial credit.
  2. Scroll down to the Options subsection, and check the box correlating to “Allow Partial Credit”.
  3. Scroll to the bottom of the page, and click either Submit or Next until you are able to click Submit.
Please note:
  • Partial credit scoring for automatically graded questions must be set up before students have taken the test.

  • If you choose to disable partial credit scoring, you must first disable the option on the question level before doing so on the test level.

Monday, February 15, 2010

Web 2.0 Tool of the Week: Evernote

(http://www.Evernote.com)
Evernote is an organization tool which stores notes, documents, websites and images. The information can be accessed from any computer or smart phone. Accounts are free.

Features of Evernote:
  • Notes created may include text notes, web pages, photos, or screenshots.
  • Organizes data, and uses tags to make searching easier.
  • Search by keywords, titles, and tags.
  • Search printed and handwritten text in images.
  • Compatible on most platforms

Using Evernote Professionally:
  • Bookmarking: save links and images from the web. Items can be tagged for quick search.
  • Random Picture Archive: take photos on your phone and save them to Evernote.
  • Collate ALL your emails: emails can be centralized by forwarding to your Evernote email address.
  • PDF Store: drag & drop or email pdf’s into Evernote for quick access or searching.
  • Instant Message Store: ever need a record of a previous instant message conversation – copy & paste it into Evernote.
  • Paper notes: take a photograph or scan them.
  • Tablet PC Notes: if you’re on a tablet pc, Evernote can store and search handwritten notes.
  • Business Cards: take a photo of business cards and search anytime.
  • Never lose that whiteboard again: take pics of your whiteboard, add it to Evernote and it’s there forever. All the text is searchable.
  • Remember: the things you were supposed to remember. Create to-do lists, jot down random thoughts, leave a voice memo, and more.
  • Twitter notes: create notes right from Twitter and save tweets that you like.

Ready to explore Evernote?
Sign up for an account here.

Already using Evernote?
Tell us how Evernote makes your life more organized.

Wednesday, February 10, 2010

Tip #62: Best Practices for Student Test Taking

A Blackboard Tip of the Week: Best Practices for Student Test Taking

Tip: You can help students reduce the chances of technological mishaps while taking exams by encouraging them to follow a few best practices.

Best Practices for Students Preparing to Take a Test:

  • Students should view Blackboard using Internet Explorer 7 or Firefox 3.5
    • Students who have already updated to Internet Explorer 8 should enable Compatibility View by clicking on the Compatibility View button located to the right of the Address Bar
  • Students should run a System Check at least 30 minutes before an exam
    • On the TWU Blackboard system front page under the Getting Started Guide, they should click on System Check
  • Students should disable pop-up blocking in their browsers
    • In Firefox, they should:
      • Go to Tools > Options > Content
      • Uncheck Block pop-up windows
      • Click OK
    • In Internet Explorer, they should:
      • Go to Tools > Pop-up Blocker
      • Click on Turn Off Pop-up Blocker
  • Students should close all other applications and browsers before starting their test, and not open any others for the duration of their exam session
  • Students should check for possible firewall issues before choosing their test taking location—especially if they plan on taking an exam at their places of employment
    • Students can make sure their test submission will not be blocked by a corporate or home firewall by submitting the Sample Exam in the Blackboard Sample Course
      1. Go to http://online.twu.edu and log in with “online” as the username and password
      2. Click on TWU Sample Course and click on Exams
      3. Take the Sample Exam (choose to “take the assessment again” if given the option)
    • If, after agreeing to submit the exam, the student receives “Assessment successfully submitted” message, then there should not be a test taking firewall problem on that location’s connection

Best Practices for Students While Taking a Test:

  • Students should not open any other browser window or application for the duration of their exam session
  • Students should not click outside of the test—including the navigation on the left side panel in Blackboard
  • Students should not click on any browser navigation such as the Back, Forward, or Home buttons
  • Students should not use the scroll wheel on their mouse as this will sometimes inadvertently change answers
  • Students should click the Save button every five questions to save their answers unless questions are being delivered one at a time—in which case, they will need to press save on every question
  • When ready to submit, students should click the Submitbutton just once

Monday, February 8, 2010

Voicemail Tip of the Week: Transfer to Voicemail

TWU has a new voicemail system for all permanent faculty and staff. The new system integrates voicemail with e-mail, delivering all messages to both telephone and e-mail. To request an account on the new system, e-mail voicemail@twu.edu and include your name, campus, and telephone extension.

Since the transition phase to the new system has occurred, the old voicemail system will be taken offline. Please clear any messages from your mailbox on the old system. Due to technical differences in the old and new system, messages will not transfer. When you have set up your box on the new system, clear out your box on the old system and send request to voicemail@twu.edu to have it deleted.

To transfer a call directly to voicemail


To transfer a call directly to voicemail without ringing the phone or in case the phone is not forwarded:
  • Stay on the phone and transfer the call to 4646 (or 814646).
  • When the system answers, press *.
  • Wait for the system to ask for the mailbox number. Enter the six digit mailbox number.
    Note
    : Six digit mailbox numbers are the campus code (Denton: 81, Dallas-Parkland: 82, Dallas-Presbyterian: 83, Houston: 84) + the four digit extension.
  • Hang up. The caller will hear the greeting and be able to leave a message.
Voicemail is available for all permanent faculty and staff. To setup an account, e-mail voicemail@twu.edu from your TWU portal e-mail account and include name, campus and telephone extension.

Wednesday, February 3, 2010

Tip #61: Alter Assessment Settings

Tip: You can alter assessment settings even after you’ve initially released an assessment. This ability allows you to release results, answers, and feedback after students have completed the assessment.

Here’s how to do it:

  1. Go to the Blackboard Control Panel, and click on the Content Area where the item is located

  2. Click on the Modify button to the right of the assessment
    • This will take you to the Modify Test page

  3. Click on Modify the Test options

  4. Scroll down to the Test Feedback subsection, and check boxes correlating to the kind(s) of test feedback you want to make accessible
    • Score
    • Submitted Answers
    • Correct Answers
    • Feedback

Monday, February 1, 2010

iPhone Apps of the Month: Organizational Apps

Organizational Apps for work and home

The iPhone offers applications that can be downloaded for a variety of uses. Applications can range from free to varying costs, and range in topic from business, education, weather, productivity, news, and more. This month’s iPhone tip highlights some free applications that can be used to organize work and school activities.

Ustream Live Broadcaster
Stream live moments from your phone and share with your friends, family, fans, followers, and others. After the live stream the video is recorded. Recorded videos can be shared to Ustream, Twitter, Facebook, YouTube, and automatically streams and records to your Ustream show page.
 

i-Clickr Lite
Use your iPhone to run a PowerPoint slide of 15 slides or less. Software must be installed on the computer running the slide show.
 

Dictionary
Dictionary & thesaurus including a Word of the Day feature.


Simplemind Express
Full featured mind mapping editor with an option to save mind maps to the camera roll.
 

My Files
App for Badongo.com, an online storage, management, and publishing system for personal content including photos, videos, music, business documents, and pdfs.
 

iPhone apps can be downloaded via the iPhone app store

Wednesday, January 27, 2010

Blackboard Tip of the Week: Copying an item from one course to another

Tip: You can copy an item from one course to another without having to use the Course Copy function on the Control Panel.
Here’s how to do it:
  1. Access the course from which you want to copy an item
  2. Go to the Blackboard Control Panel, and click on the Content Area where the item is located
    • For example, if you want to copy a folder that is located in Course Documents, click on the Course Documents course menu link
  3. Click on the Copy button next to the item you want to copy
  4. On the next screen, select the destination course from the drop-down list of courses
    • NOTE: Only courses for which you are an instructor are listed in this drop-down list
  5. Click Browse to find a destination folder within the destination course
  6. Select whether you would like the item to be removed from the current course after it is copied to the destination course
  7. Click Submit
  8. When you receive confirmation via email that the item copy was successfully completed, navigate to the destination to confirm that the item was successfully copied