Wednesday, July 23, 2008

Tip #26: Using tables to organize VTBE content

Tip: Use tables in the Visual Text Box Editor (VTBE) to organize your content and images.

Here’s how to do it:
Navigate to a content area in your course (e.g. Course Documents) and click the Edit View link in the upper right-hand corner of the page. Click the + Item button to add a new item. Name the item and then click in the text box below. This is where you will add your table.

On the Visual Text Box Editor (VTBE), click the Create Table button.
Select the number of columns and rows for the table. Click Submit to add the table to the text box.


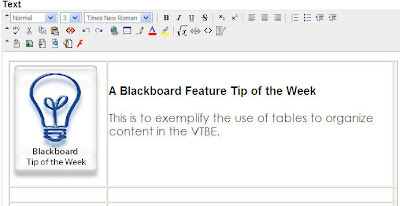
Add text or images to your table. After you have added your content, click the Submit button to save your content. Below is an example of how you might use tables to organize your content:


How to remove the table outlines:
To remove the table outlines, you will need to modify the HTML code for the table. Click the < > button on the VTBE to open the HTML view. You will see the following format code for the table:

To remove the table outlines, you will need to modify the HTML code for the table. Click the < > button on the VTBE to open the HTML view. You will see the following format code for the table:


In the part of the code that says “border=1”, change the 1 to a 0. Click the < > button again to switch back to your standard view. You will see that the table borders have disappeared. Click Submit to save your changes.

Want more information?
Step-by-step tutorials are available at: http://www.twu.edu/blackboard/Bb72Tutorials.asp
Visit our website: http://www.twu.edu/blackboard,or call: (940) 898-3706

Monday, July 21, 2008

Tip #25: Adding audio, video, or Flash using the VTBE

Tip: You can add audio, video, or Flash to a Blackboard item using the Visual Text Box Editor (VTBE).

Here’s how to do it:

Navigate to a content area in your course (e.g. Course Documents) and click the Edit View link in the upper right-hand corner of the page. Click the + Item button to add a new item. Name the item and then click in the text box below. This is where you will add the audio, video, or Flash.

On the Visual Text Box Editor (VTBE), click the Add button for the component you would like to add (from left to right, those buttons are Add MPEG/AVI content, Add QuickTime content, Add Audio content, and Add Flash content):


Click the Browse button to locate the file on your computer or external drive. Select the file options you would like and click the Submit button. On the preview page, click Submit again to add your content.

Caution regarding adding audio, video, or Flash files:
Be aware of the file size of the audio, video, or Flash file you add to your course. The larger the file size, the more difficulties students will experience in viewing that file and the Blackboard page on which the file is located. We recommend that any file uploaded to Blackboard is no larger than 5 MB.
Want more information?
Step-by-step tutorials are available at:
http://www.twu.edu/blackboard/Bb72Tutorials.asp
Visit our website: http://www.twu.edu/blackboard,
or call: (940) 898-3706

Wednesday, July 9, 2008

Tip #24: Adding an image using the VTBE

Tip: Add an image to your course using the Visual Text Box Editor (VTBE).

Here’s how to do it:
Navigate to a content area in your course (e.g. Course Documents) and click the Edit View link in the upper right-hand corner of the page. Click the + Item button to add a new item. Name the item and then click in the text box below. This is where you will add the image.

On the Visual Text Box Editor (VTBE), click the Add Image button.


Click the Browse button to locate the image file on your computer or external drive. Select any image options you would like and click the Submit button. Resize the image by clicking on the image and dragging the corners in or out, depending on whether you want to enlarge or shrink the image.

What to do if you do not see the VTBE:
Check to make sure that your VTBE is enabled. On your Blackboard welcome page (where your courses are listed), click the Personal Information link on the left-hand Tools menu. Click Set Visual Text Box Editor Options and make sure that the VTBE is enabled. Click Submit. You will need to log out and log back in to Blackboard to see your changes.

The VTBE for Safari users does not have the Add Image button. Macintosh users should use the Firefox browser to enable the full version of the VTBE.

Want more information?
Step-by-step tutorials are available at:
http://www.twu.edu/blackboard/Bb72Tutorials.asp
Visit our website: http://www.twu.edu/blackboard,
or call: (940) 898-3706

Tuesday, July 8, 2008

Tip #23: Creating an anonymous survey

Tip: You can create an anonymous survey in Blackboard.

Here’s how to do it:
Navigate to the Control Panel of your course and click Survey Manager. Click the + Add Survey button. Type a name for the survey and type any description or instructions you want to provide. Click Submit.

Add questions to the survey by clicking the drop-down menu next to the words Add Calculated Formula. Select the type of question you would like to add and click the Go button. For open-ended questions, select the Short Answer or Essay question types. Continue adding questions until you have completed your survey.

To launch the survey in your course, navigate to the course area to which you would like to add the survey. Click the Edit View link at the upper right corner of the page. Click the drop-down menu next to the words + Select: Learning Unit and select the Survey option. Click the Go button. Select the survey you created and click Submit. To change the survey availability and settings, click the Modify the Survey options link on the following page.

Survey anonymity in Blackboard:
Surveys in Blackboard are anonymous, so you will not be able to discern individuals’ survey answers. To view the full survey results, navigate to your course Gradebook. Locate the survey Gradebook item and click name of the survey. Click the Download Results link and select your download options. NOTE: Microsoft Excel will open a .csv file or a tab-delimited file.

Want more information?
Step-by-step tutorials are available at:
http://www.twu.edu/blackboard/Bb72Tutorials.asp
Visit our website: http://www.twu.edu/blackboard,
or call: (940) 898-3706

Thursday, June 26, 2008

Tip #22: Adding a course tool link

Tip: You can add a course tool link to a content area in your course.

Here’s how to do it:
Enter your course and click the course menu link for the content area to which you would like to add a tool. For example, if you want to add a tool link to your Course Documents content area, click on Course Documents.

Click the Edit View link on the top right corner of the page. Click the drop-down menu next to the Select icon and select the Tool option. Click Go.

Select the tool link you want to add and click the Next button.

Using tool links:
Consider adding tools to content areas to facilitate students’ navigation of the course. For example, if the students’ first task in the course is to create a Blackboard homepage, consider adding a homepage tool link to your First Tasks, Syllabus, or Assignments content area.

Want more information?
Step-by-step tutorials are available at:

http://www.twu.edu/blackboard/Bb72Tutorials.asp
Visit our website: http://www.twu.edu/blackboard,
or call: (940) 898-3706

Tuesday, June 24, 2008

Tip #21: Adding a glossary

Tip: You can add a glossary to your Blackboard course.

Here’s how to do it:
Navigate to your course Control Panel and click Glossary Manager. Click the +Add Term button to add a new term and its definition. Click Submit to save the term and definition. Follow the same steps to add more terms to the glossary.

You can create your glossary in Excel or in Notepad and upload it into your Blackboard shell. Click the Upload Glossary button and Browse for the glossary file you created. Click Submit to upload the glossary.


Creating a glossary in Excel or Notepad:
Create your glossary in Excel by creating a column for the terms and a column for the definitions. Save the Excel glossary as a tab-delimited file or .csv file.
To create your glossary in Notepad, type the term and definition in quotation marks and separate the term and definition with a comma: “term”,“definition” (do not type any spaces between the characters). Save the Notepad file as a .txt file or .csv file.


Want more information?
Step-by-step tutorials are available at:
http://www.twu.edu/blackboard/Bb72Tutorials.asp
Visit our website: http://www.twu.edu/blackboard,
or call: (940) 898-3706

Thursday, June 12, 2008

Tip #20: Downloading students' Assignments all at once

Tip: Download students’ Assignments to your computer all at once through the Gradebook.

Here’s how to do it:
The Blackboard Assignments feature gives instructors several options for viewing students’ work. Create an Assignment to which students can submit their work. When you are ready to download students’ work, navigate to your course Gradebook.


Click the name of the Assignment in the Gradebook and click Item Download. To download all the students’ Assignments, click the Select All link at the top of the page and click Submit. The students’ assignments will be packaged as a .zip file that can be downloaded to your computer. Right-click the link provided, select “Save Target As…” and save the file to your computer.

Errors when downloading students’ assignment files:
Some instructors may receive an error when attempting to download students’ Assignments all at once. To reduce the incidence of this error, recommend to students that they follow Blackboard-appropriate naming conventions (see Tip # 19). If you still encounter the problem, download the students’ Assignments individually.

Want more information?
Step-by-step tutorials are available at:
http://www.twu.edu/blackboard/Bb72Tutorials.asp
Visit our website: http://www.twu.edu/blackboard,
or call: (940) 898-3706

Friday, June 6, 2008

Tip #19: Naming files for Blackboard

Tip: Reduce the number of error messages you and students receive when opening files by appropriately naming files uploaded to Blackboard.

Here’s how to do it:
There are several file name characters that may lead to error messages when instructors or students upload or download files. To reduce the occurrence of those errors, follow these naming conventions:


• Use only letters, numbers, underscores, and hyphens in file names
• Use hyphens or underscores in place of spaces in file names
• Do not use periods in a file name, except before the file extension (e.g. “Name_test1.doc”)
• Do not use spaces, commas, pound signs (#), question marks, equal signs, ampersands (&), asterisks (*), or any other special characters in file names
• Keep file names under 60 characters in length

You may recommend to students that they follow these same naming conventions. This is helpful when you are downloading multiple students’ files all at once (e.g. downloading students’ completed assignments)

Uploading multiple files into Blackboard:
When you upload multiple files into Blackboard, they are automatically organized numerically then alphabetically by the name of the file. If you want a specific order in which your files will appear, name the files accordingly. For example, you may name a file 1_Hill_article and another file 2_McCubbins_article so that they appear in numerical order.

Want more information?
Step-by-step tutorials are available at: http://www.twu.edu/blackboard/Bb72Tutorials.asp
Visit our website: http://www.twu.edu/blackboard,
or call: (940) 898-3706